
9 Delightful Homemade Cheeses: Recipes, Steps, and Tips
Cheese is a versatile ingredient loved by many for its rich flavors and textures. Exploring the world of homemade cheese opens up a world of culinary creativity and the opportunity to enjoy a wide variety of unique flavors. In this blog, we will embark on a delightful journey through 10 different types of homemade cheeses, providing recipes, step-by-step instructions, essential tips, suitable uses, and an estimated time frame for each cheese. Let's dive in and discover the joy of making your own delicious cheeses!
Equipment Needed:
Before we start making our cheeses, let's ensure we have the necessary equipment:
1. Cheese Vat or Large Pot: A stainless steel or enamel-coated pot to heat and hold the milk during the cheesemaking process.
2. Thermometer: A food-grade thermometer to accurately measure the temperature of the milk at various stages.
3. Cheese Mold: Specific molds are required for shaping and pressing the curds of different cheeses.
4. Cheese Cloth: Fine-grade cheesecloth or butter muslin to line the cheese molds and allow whey drainage.
6. Cheese Aging Cave or Fridge: A controlled environment with the right temperature and humidity to age the cheeses.
7. Cheese Wax or Wrap: For preserving and aging certain types of cheeses, wax or cheese paper can create a protective barrier.
8. Cheese Knife and Cheese Board: Essential tools for serving and enjoying your homemade cheeses.
Now, let's explore the recipes, steps, tips, suitable uses, and estimated time frames for each cheese:

1.Mozzarella:
Ingredients:
- 4 gallons of fresh cow's milk (pasteurized, but not ultra-pasteurized)
- 1/4 teaspoon mesophilic starter culture
- 1/4 teaspoon calcium chloride (if using pasteurized milk)
- 1/4 teaspoon liquid calcium chloride diluted in 1/4 cup non-chlorinated water (if using raw milk)
- 1/4 teaspoon liquid rennet diluted in 1/4 cup non-chlorinated water
- 2 tablespoons cheese salt
- Cheese wax (for aging, optional)
Equipment:
- Large stainless steel pot
- Thermometer
- Long knife or curd cutter
- Cheese mold
- Cheese press
- Cheese mat
- Cheese aging container or cheese cave
Steps:
1. Sanitize all your equipment by thoroughly cleaning them before starting.
2. Heat the milk in a large stainless steel pot over medium heat until it reaches a temperature of 86°F (30°C).
3. Sprinkle the mesophilic starter culture evenly over the milk's surface and let it rehydrate for 1-2 minutes. Then gently stir the culture into the milk using an up-and-down motion.
4. If using pasteurized milk, add calcium chloride to the milk and stir gently. If using raw milk, add the diluted liquid calcium chloride to the milk and stir gently.
5. Cover the pot and let the milk ripen for 45 minutes at 86°F (30°C).
6. Slowly heat the milk to 102°F (39°C) over the course of 30 minutes, stirring gently to prevent the formation of hotspots.
7. Once the milk reaches 102°F (39°C), add the diluted rennet and stir it into the milk for about 1 minute. Then cover the pot and let it sit undisturbed for 45 minutes to allow the curds to form.
8. After 45 minutes, check for a clean break by inserting a knife or your finger at a 45-degree angle into the curds. If they separate cleanly, it's time to cut the curds. If not, let them sit for a few more minutes.
9. Cut the curds into small, uniform pieces using a long knife or curd cutter. Start with vertical cuts about 1/2 inch (1.3 cm) apart, and then make horizontal cuts in the opposite direction. Allow the curds to rest for 5 minutes.
10. Slowly heat the curds to 110°F (43°C) over the course of 40 minutes, while gently stirring them. Maintain this temperature for an additional 30 minutes, stirring occasionally.
11. Drain the whey from the curds by transferring them to a cheesecloth-lined colander or cheese mold. Let the curds drain for 15 minutes, flipping them occasionally.
12. Sprinkle the cheese salt evenly over the curds and gently mix it in. This helps to enhance the flavor and aid in preservation.
13. Transfer the curds to a cheese mold, pressing them gently to remove any remaining whey. Place a follower (a flat plate or another mold) on top of the curds, and then place a weight on the follower to start pressing.
14. Press the curds at 10 pounds (4.5 kg) of pressure for 15 minutes. Then increase the pressure to 20 pounds (9 kg) and press for 15 minutes. Finally, increase the pressure to 40 pounds (18 kg) and press for 12 hours.
15. After pressing, remove the cheese from the mold, unwrap it, and let
it air dry at room temperature for 1-3 days, or until the surface feels dry to the touch.
16. If desired, wax the cheese using cheese wax to protect it during the aging process. This step is optional but helps to prevent moisture loss and maintain flavor.
17. Age the cheese in a cool, humid environment such as a cheese aging container or cheese cave. Cheddar cheese typically needs to age for at least 2-3 months, but it can be aged for longer periods, up to several years, for more complex flavors.
Tips:
- Use high-quality, fresh milk for the best results.
- Maintain a clean and sanitary environment throughout the cheese-making process.
- Follow the temperature and time instructions carefully to achieve the desired texture and flavor.
- Be gentle when stirring and cutting the curds to avoid breaking them too small.
- Adjust the pressing time and weight based on personal preference and desired texture.
- Regularly monitor the aging cheese for any signs of mold or spoilage and adjust the temperature and humidity accordingly.
Making cheddar cheese requires time and patience. The cheese-making process itself can take around 1-2 days, including pressing and initial drying. However, the cheese needs to age for at least 2-3 months before it's ready to be consumed. Aging times can vary based on personal preference and desired flavor profile. The longer the cheese ages, the sharper and more complex the flavor becomes.
Note: This recipe provides a basic overview of the cheddar cheese-making process. Cheese making can be a delicate and nuanced craft, so it's recommended to consult detailed recipes and resources specific to cheddar cheese-making for more in-depth instructions and troubleshooting guidance.

2.Chedder:
Ingredients:
- 4 gallons of fresh cow's milk (pasteurized, but not ultra-pasteurized)
- 1/4 teaspoon mesophilic starter culture
- 1/4 teaspoon calcium chloride (if using pasteurized milk)
- 1/4 teaspoon liquid calcium chloride diluted in 1/4 cup non-chlorinated water (if using raw milk)
- 1/4 teaspoon liquid rennet diluted in 1/4 cup non-chlorinated water
- 2 tablespoons cheese salt
- Cheese wax (for aging, optional)
Equipment:
- Large stainless steel pot
- Thermometer
- Long knife or curd cutter
- Cheese mold
- Cheese press
- Cheese mat
- Cheese aging container or cheese cave
Steps:
1. Sanitize all your equipment by thoroughly cleaning them before starting.
2. Heat the milk in a large stainless steel pot over medium heat until it reaches a temperature of 86°F (30°C).
3. Sprinkle the mesophilic starter culture evenly over the milk's surface and let it rehydrate for 1-2 minutes. Then gently stir the culture into the milk using an up-and-down motion.
4. If using pasteurized milk, add calcium chloride to the milk and stir gently. If using raw milk, add the diluted liquid calcium chloride to the milk and stir gently.
5. Cover the pot and let the milk ripen for 45 minutes at 86°F (30°C).
6. Slowly heat the milk to 102°F (39°C) over the course of 30 minutes, stirring gently to prevent the formation of hotspots.
7. Once the milk reaches 102°F (39°C), add the diluted rennet and stir it into the milk for about 1 minute. Then cover the pot and let it sit undisturbed for 45 minutes to allow the curds to form.
8. After 45 minutes, check for a clean break by inserting a knife or your finger at a 45-degree angle into the curds. If they separate cleanly, it's time to cut the curds. If not, let them sit for a few more minutes.
9. Cut the curds into small, uniform pieces using a long knife or curd cutter. Start with vertical cuts about 1/2 inch (1.3 cm) apart, and then make horizontal cuts in the opposite direction. Allow the curds to rest for 5 minutes.
10. Slowly heat the curds to 110°F (43°C) over the course of 40 minutes, while gently stirring them. Maintain this temperature for an additional 30 minutes, stirring occasionally.
11. Drain the whey from the curds by transferring them to a cheesecloth-lined colander or cheese mold. Let the curds drain for 15 minutes, flipping them occasionally.
12. Sprinkle the cheese salt evenly over the curds and gently mix it in. This helps to enhance the flavor and aid in preservation.
13. Transfer the curds to a cheese mold, pressing them gently to remove any remaining whey. Place a follower (a flat plate or another mold) on top of the curds, and then place a weight on the follower to start pressing.
14. Press the curds at 10 pounds (4.5 kg) of pressure for 15 minutes. Then increase the pressure to 20 pounds (9 kg) and press for 15 minutes. Finally, increase the pressure to 40 pounds (18 kg) and press for 12 hours.
15. After pressing, remove the cheese from the mold, unwrap it, and let
it air dry at room temperature for 1-3 days, or until the surface feels dry to the touch.
16. If desired, wax the cheese using cheese wax to protect it during the aging process. This step is optional but helps to prevent moisture loss and maintain flavor.
17. Age the cheese in a cool, humid environment such as a cheese aging container or cheese cave. Cheddar cheese typically needs to age for at least 2-3 months, but it can be aged for longer periods, up to several years, for more complex flavors.
Tips:
- Use high-quality, fresh milk for the best results.
- Maintain a clean and sanitary environment throughout the cheese-making process.
- Follow the temperature and time instructions carefully to achieve the desired texture and flavor.
- Be gentle when stirring and cutting the curds to avoid breaking them too small.
- Adjust the pressing time and weight based on personal preference and desired texture.
- Regularly monitor the aging cheese for any signs of mold or spoilage and adjust the temperature and humidity accordingly.
Making cheddar cheese requires time and patience. The cheese-making process itself can take around 1-2 days, including pressing and initial drying. However, the cheese needs to age for at least 2-3 months before it's ready to be consumed. Aging times can vary based on personal preference and desired flavor profile. The longer the cheese ages, the sharper and more complex the flavor becomes.
Note: This recipe provides a basic overview of the cheddar cheese-making process. Cheese making can be a delicate and nuanced craft, so it's recommended to consult detailed recipes and resources specific to cheddar cheese-making for more in-depth instructions and troubleshooting guidance.

3.Swiss:
Ingredients:
- 2 gallons of fresh cow's milk (pasteurized, but not ultra-pasteurized)
- 1/4 teaspoon mesophilic starter culture
- 1/4 teaspoon liquid calcium chloride diluted in 1/4 cup non-chlorinated water
- 1/4 teaspoon liquid rennet diluted in 1/4 cup non-chlorinated water
- 2 tablespoons cheese salt
Equipment:
- Large stainless steel pot
- Thermometer
- Long knife or curd cutter
- Slotted spoon or ladle
- Cheese mold
- Cheese press
- Cheese mat
- Cheese aging container or cheese cave
Steps:
1. Sanitize all your equipment by thoroughly cleaning them before starting.
2. Pour the milk into a large stainless steel pot and heat it over medium heat until it reaches a temperature of 86°F (30°C).
3. Sprinkle the mesophilic starter culture evenly over the milk's surface and let it rehydrate for 1-2 minutes. Stir gently to incorporate the culture into the milk.
4. Add the diluted liquid calcium chloride to the milk and stir gently to distribute it evenly.
5. Cover the pot and let the milk ripen for 45 minutes at 86°F (30°C).
6. Slowly heat the milk to 102°F (39°C) over the course of 30 minutes, stirring gently to prevent hotspots.
7. Once the milk reaches 102°F (39°C), add the diluted rennet and stir it into the milk using an up-and-down motion for about 1 minute. Then cover the pot and let it sit undisturbed for 45 minutes to allow the curds to form.
8. After 45 minutes, check for a clean break by inserting a knife or your finger at a 45-degree angle into the curds. If they separate cleanly, it's time to cut the curds. If not, let them sit for a few more minutes.
9. Cut the curds into small, uniform pieces using a long knife or curd cutter. Aim for cubes about 1/4 inch (0.6 cm) in size. Allow the curds to rest for 5 minutes.
10. Slowly heat the curds to 132°F (56°C) over the course of 30 minutes, while gently stirring them. Maintain this temperature for an additional 30 minutes, stirring occasionally.
11. Drain off the whey from the curds, reserving a portion of it. Replace the whey with hot water at a temperature of 130°F (54°C) to maintain the curds' heat.
12. Transfer the curds to a cheese mold, pressing them gently to remove any remaining whey. Place a follower (a flat plate or another mold) on top of the curds, and then place a weight on the follower to start pressing.
13. Press the curds at 20 pounds (9 kg) of pressure for 30 minutes. Then increase the pressure to 40 pounds (18 kg) and press for 2 hours.
14. Remove the cheese from the mold, flip it, re-dress it, and press at 50 pounds (23 kg) of pressure for 12 hours.
15. After pressing, remove the cheese from the mold and let it air dry at room temperature for 2-3 days. Flip the cheese regularly to ensure even drying.
16. Once the cheese is dry to the touch, move it to a cool environment (around 55-60°F or 13-15°C) with high humidity, such as a cheese aging container or cheese cave.
17. Age the cheese for at least 2-3 months, and up to several months or longer for more pronounced flavor development. During the aging process, flip the cheese and wipe it with a brine solution every few days to develop a rind.
Tips:
- Use high-quality, fresh milk for the best results.
- Maintain a clean and sanitary environment throughout the cheese-making process.
- Follow the temperature and time instructions carefully to achieve the desired texture and flavor.
- Be gentle when stirring and cutting the curds to avoid breaking them too small.
- Adjust the pressing time and weight based on personal preference and desired texture.
- Regularly monitor the aging cheese for any signs of mold or spoilage and adjust the temperature and humidity accordingly.
Making Swiss cheese requires time and patience. The cheese-making process itself can take around 1-2 days, including pressing and initial drying. However, the cheese needs to age for at least 2-3 months before it's ready to be consumed. Aging times can vary based on personal preference and desired flavor profile. The longer the cheese ages, the more pronounced and complex the flavor becomes.
Note: This recipe provides a basic overview of the Swiss cheese-making process. Cheese making can be a delicate and nuanced craft, so it's recommended to consult detailed recipes and resources specific to Swiss cheese-making for more in-depth instructions and troubleshooting guidance.
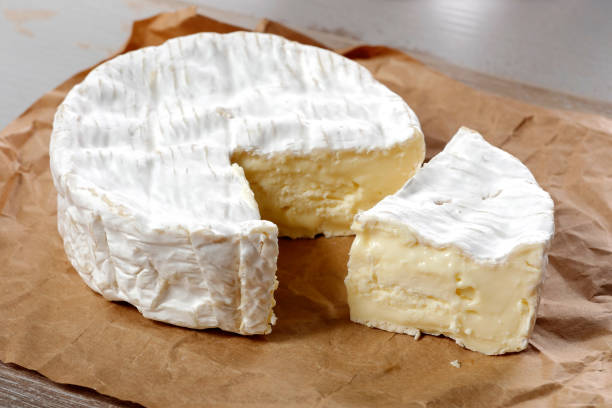
4.Camember:
Ingredients:
- 2 gallons of fresh cow's milk (pasteurized, but not ultra-pasteurized)
- 1/8 teaspoon mesophilic starter culture
- 1/8 teaspoon Penicillium candidum (white mold powder)
- 1/16 teaspoon Geotrichum candidum (optional, for bloomy rind)
- 1/4 teaspoon liquid calcium chloride diluted in 1/4 cup non-chlorinated water
- 1/4 teaspoon liquid rennet diluted in 1/4 cup non-chlorinated water
- Cheese salt
Equipment:
- Large stainless steel pot
- Thermometer
- Long knife or curd cutter
- Cheese molds
- Cheese aging container or cheese cave
- Cheese mat or bamboo mat
Steps:
1. Sanitize all your equipment by thoroughly cleaning them before starting.
2. Pour the milk into a large stainless steel pot and heat it over medium heat until it reaches a temperature of 86°F (30°C).
3. Sprinkle the mesophilic starter culture evenly over the milk's surface and let it rehydrate for 1-2 minutes. Stir gently to incorporate the culture into the milk.
4. Sprinkle the Penicillium candidum (white mold powder) and Geotrichum candidum (if using) over the milk's surface and let it rehydrate for 1-2 minutes. Stir gently to incorporate the molds into the milk.
5. Add the diluted liquid calcium chloride to the milk and stir gently to distribute it evenly.
6. Cover the pot and let the milk ripen for 45 minutes at 86°F (30°C).
7. Slowly heat the milk to 90°F (32°C) over the course of 30 minutes, stirring gently to prevent hotspots.
8. Once the milk reaches 90°F (32°C), add the diluted rennet and stir it into the milk using an up-and-down motion for about 1 minute. Then cover the pot and let it sit undisturbed for 45 minutes to allow the curds to form.
9. After 45 minutes, check for a clean break by inserting a knife or your finger at a 45-degree angle into the curds. If they separate cleanly, it's time to cut the curds. If not, let them sit for a few more minutes.
10. Cut the curds into small, uniform pieces using a long knife or curd cutter. Aim for cubes about 1/4 inch (0.6 cm) in size. Allow the curds to rest for 5 minutes.
11. Slowly heat the curds to 98°F (37°C) over the course of 30 minutes, while gently stirring them. Maintain this temperature for an additional 30 minutes, stirring occasionally.
12. Drain off the whey from the curds, reserving a portion of it. Replace the whey with hot water at a temperature of 98°F (37°C) to maintain the curds' heat.
13. Transfer the curds to cheese molds, gently pressing them to remove excess whey. Sprinkle cheese salt on top of the curds in the molds.
14. Flip the cheese molds every 30 minutes for the first 2 hours, then every hour for the next 4 hours to help shape the cheese and remove additional whey.
15. Remove the cheese from the molds and place them on a cheese mat or bamboo mat in a cheese aging container or cheese cave. Maintain a temperature of around 50-54°F (10-12°C) and high humidity (85-90%).
16. Flip the cheese every day for the first week, then every few days for the next 2-3 weeks. During this time, the white mold will grow and the cheese will develop its characteristic bloomy rind.
17. After 2-3 weeks, the cheese will be ready for consumption. At this point, it will have a soft, creamy texture and a mild flavor. For a stronger flavor, you can continue aging it for a few more weeks.
Tips:
- Use high-quality, fresh milk for the best results.
- Maintain a clean and sanitary environment throughout the cheese-making process.
- Follow the temperature and time instructions carefully to achieve the desired texture and flavor.
- Be gentle when stirring and cutting the curds to avoid breaking them too small.
- Monitor the temperature and humidity levels in the cheese aging container or cheese cave to ensure proper conditions for mold growth and ripening.
- Regularly inspect the cheese for any signs of mold or spoilage and adjust the environment if needed.
The process of making Camembert cheese can take around 4-6 weeks, depending on the desired level of ripeness. After the initial preparation and curd formation, the cheese needs to be aged for at least 2-3 weeks to allow the white mold to develop and the flavors to mature. However, some cheesemakers prefer to age it longer for a stronger flavor. It's important to monitor the cheese during the aging process and adjust the aging time based on personal preference.
Note: This recipe provides a basic overview of the Camembert cheese-making process. Cheese making can be a delicate and nuanced craft, so it's recommended to consult detailed recipes and resources specific to Camembert cheese-making for more in-depth instructions and troubleshooting guidance.

5.Blue Cheese:
Ingredients:
- 2 gallons of fresh cow's milk (pasteurized, but not ultra-pasteurized)
- 1/8 teaspoon mesophilic starter culture
- 1/16 teaspoon Penicillium roqueforti (blue mold powder)
- 1/4 teaspoon liquid calcium chloride diluted in 1/4 cup non-chlorinated water
- 1/4 teaspoon liquid rennet diluted in 1/4 cup non-chlorinated water
- Cheese salt
Equipment:
- Large stainless steel pot
- Thermometer
- Long knife or curd cutter
- Cheese molds
- Cheese aging container or cheese cave
- Cheese mat or bamboo mat
Steps:
1. Sanitize all your equipment by thoroughly cleaning them before starting.
2. Pour the milk into a large stainless steel pot and heat it over medium heat until it reaches a temperature of 86°F (30°C).
3. Sprinkle the mesophilic starter culture evenly over the milk's surface and let it rehydrate for 1-2 minutes. Stir gently to incorporate the culture into the milk.
4. Sprinkle the Penicillium roqueforti (blue mold powder) over the milk's surface and let it rehydrate for 1-2 minutes. Stir gently to incorporate the mold into the milk.
5. Add the diluted liquid calcium chloride to the milk and stir gently to distribute it evenly.
6. Cover the pot and let the milk ripen for 45 minutes at 86°F (30°C).
7. Slowly heat the milk to 90°F (32°C) over the course of 30 minutes, stirring gently to prevent hotspots.
8. Once the milk reaches 90°F (32°C), add the diluted rennet and stir it into the milk using an up-and-down motion for about 1 minute. Then cover the pot and let it sit undisturbed for 45 minutes to allow the curds to form.
9. After 45 minutes, check for a clean break by inserting a knife or your finger at a 45-degree angle into the curds. If they separate cleanly, it's time to cut the curds. If not, let them sit for a few more minutes.
10. Cut the curds into small, uniform pieces using a long knife or curd cutter. Aim for cubes about 1/4 inch (0.6 cm) in size. Allow the curds to rest for 5 minutes.
11. Slowly heat the curds to 100°F (38°C) over the course of 30 minutes, while gently stirring them. Maintain this temperature for an additional 30 minutes, stirring occasionally.
12. Drain off the whey from the curds, reserving a portion of it. Replace the whey with hot water at a temperature of 100°F (38°C) to maintain the curds' heat.
13. Transfer the curds to cheese molds, gently pressing them to remove excess whey. Sprinkle cheese salt on top of the curds in the molds.
14. Flip the cheese molds every 30 minutes for the first 2 hours, then every hour for the next 4 hours to help shape the cheese and remove additional whey.
15. Remove the cheese from the molds and place them on a cheese mat or bamboo mat in a cheese aging container or cheese cave. Maintain a temperature of around 50-55°F (10-13°C) and high humidity (85-90%).
16. After 24 hours, transfer the cheese to a cooler area with a temperature of around 45-50°F (7-10°C) to encourage blue mold growth.
17. Pierce the cheese with stainless steel skewers or needles to create channels for air circulation and blue mold development. Pierce the cheese every few days for the first few weeks.
18. Continue aging the cheese in the cooler environment for 2-4 months, or even longer for a stronger flavor. During this time, the blue mold will develop and spread throughout the cheese, creating the characteristic blue veins.
Tips:
- Use high-quality, fresh milk for the best results.
- Maintain a clean and sanitary environment throughout the cheese-making process.
- Follow the temperature and time instructions carefully to achieve the desired texture and flavor.
- Be gentle when stirring and cutting the curds to avoid breaking them too small.
- Monitor the temperature and humidity levels in the cheese aging container or cheese cave to ensure proper conditions for mold growth and ripening.
- Regularly inspect the cheese for any signs of mold or spoilage and adjust the environment if needed.
The process of making blue cheese can take around 2-4 months or longer, depending on the desired level of ripeness and flavor development. The cheese needs to be aged for several weeks to allow the blue mold to develop and the flavors to mature. It's important to monitor the cheese during the aging process and adjust the aging time based on personal preference.
Note: This recipe provides a basic overview of the blue cheese-making process. Cheese making can be a delicate and nuanced craft, so it's recommended to consult detailed recipes and resources specific to blue cheese-making for more in-depth instructions and troubleshooting guidance.
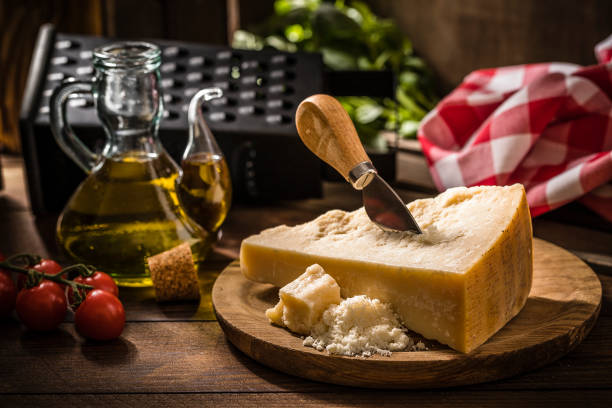
6.Parmesan cheese
Ingredients:
- 2 gallons of fresh cow's milk (raw or pasteurized)
- 1/8 teaspoon thermophilic starter culture
- 1/8 teaspoon calcium chloride (if using pasteurized milk)
- 1/4 teaspoon liquid rennet diluted in 1/4 cup non-chlorinated water
- Cheese salt
Equipment:
- Large stainless steel pot
- Thermometer
- Long knife or curd cutter
- Cheese molds
- Cheese press
- Cheese aging container or cheese cave
- Cheese mat or bamboo mat
Steps:
1. Sanitize all your equipment by thoroughly cleaning them before starting.
2. Pour the milk into a large stainless steel pot and heat it over medium heat until it reaches a temperature of 86°F (30°C).
3. Sprinkle the thermophilic starter culture evenly over the milk's surface and let it rehydrate for 1-2 minutes. Stir gently to incorporate the culture into the milk.
4. If using pasteurized milk, add the calcium chloride to the milk and stir gently to distribute it evenly.
5. Cover the pot and let the milk ripen for 45 minutes at 86°F (30°C).
6. Slowly heat the milk to 104°F (40°C) over the course of 45 minutes, stirring gently to prevent hotspots.
7. Once the milk reaches 104°F (40°C), add the diluted rennet and stir it into the milk using an up-and-down motion for about 1 minute. Then cover the pot and let it sit undisturbed for 45 minutes to allow the curds to form.
8. After 45 minutes, check for a clean break by inserting a knife or your finger at a 45-degree angle into the curds. If they separate cleanly, it's time to cut the curds. If not, let them sit for a few more minutes.
9. Cut the curds into small, uniform pieces using a long knife or curd cutter. Aim for cubes about 1/4 inch (0.6 cm) in size. Allow the curds to rest for 5 minutes.
10. Slowly heat the curds to 131°F (55°C) over the course of 45 minutes, while gently stirring them. Maintain this temperature for an additional 45 minutes, stirring occasionally.
11. Drain off the whey from the curds, reserving a portion of it. Replace the whey with hot water at a temperature of 131°F (55°C) to maintain the curds' heat.
12. Transfer the curds to cheese molds, layering them and applying pressure to remove excess whey. Stack the molds with a weight on top to press the curds for 20-30 minutes.
13. Remove the cheese from the molds and flip it. Re-mold the cheese and apply pressure for another 20-30 minutes.
14. Repeat the flipping and pressing process a few more times over the next few hours, gradually increasing the weight. Press the cheese for a total of 12-24 hours.
15. Remove the cheese from the press, sprinkle cheese salt on all surfaces, and allow it to air dry at room temperature for a day or two.
16. Transfer the cheese to a cheese aging container or cheese cave, maintaining a temperature of around 55-59°F (13-15°C) and high humidity (80-85%).
17. Age the cheese for a minimum of 12 months, but preferably 24 months or longer for a more developed flavor. During the aging process
, regularly inspect the cheese for any signs of mold or spoilage and brush the surface to remove any unwanted growth.
Tips:
- Use high-quality, fresh milk for the best results. Raw milk is traditionally used for Parmesan, but pasteurized milk can also be used.
- Maintain a clean and sanitary environment throughout the cheese-making process.
- Follow the temperature and time instructions carefully to achieve the desired texture and flavor.
- Be gentle when stirring and cutting the curds to avoid breaking them too small.
- Monitor the temperature and humidity levels in the cheese aging container or cheese cave to ensure proper conditions for aging and flavor development.
- Regularly brush the cheese during the aging process to remove any unwanted mold or unwanted growth.
The process of making Parmesan cheese is quite involved and requires a significant amount of time for aging. It typically takes a minimum of 12 months to age Parmesan cheese, but it is recommended to age it for at least 24 months or longer for optimal flavor development. The aging process allows the cheese to develop its characteristic nutty and savory flavors.
Note: This recipe provides a basic overview of the Parmesan cheese-making process. Cheese making can be a delicate and nuanced craft, so it's recommended to consult detailed recipes and resources specific to Parmesan cheese-making for more in-depth instructions and troubleshooting guidance.
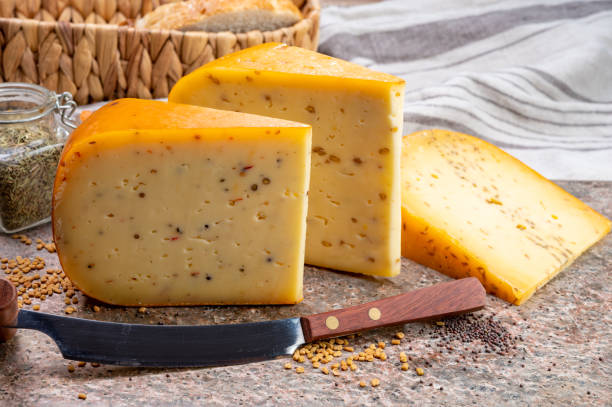
7.Gouda:
Ingredients:
- 2 gallons of fresh cow's milk (raw or pasteurized)
- 1/8 teaspoon mesophilic starter culture
- 1/4 teaspoon liquid calcium chloride (if using pasteurized milk)
- 1/4 teaspoon liquid rennet diluted in 1/4 cup non-chlorinated water
- Cheese salt
Equipment:
- Large stainless steel pot
- Thermometer
- Long knife or curd cutter
- Cheese molds
- Cheese press
- Cheese aging container or cheese cave
- Cheese mat or bamboo mat
Steps:
1. Sanitize all your equipment by thoroughly cleaning them before starting.
2. Pour the milk into a large stainless steel pot and heat it over medium heat until it reaches a temperature of 86°F (30°C).
3. Sprinkle the mesophilic starter culture evenly over the milk's surface and let it rehydrate for 1-2 minutes. Stir gently to incorporate the culture into the milk.
4. If using pasteurized milk, add the liquid calcium chloride to the milk and stir gently to distribute it evenly.
5. Cover the pot and let the milk ripen for 45 minutes at 86°F (30°C).
6. Slowly heat the milk to 90°F (32°C) over the course of 30 minutes, stirring gently to prevent hotspots.
7. Once the milk reaches 90°F (32°C), add the diluted rennet and stir it into the milk using an up-and-down motion for about 1 minute. Then cover the pot and let it sit undisturbed for 45 minutes to allow the curds to form.
8. After 45 minutes, check for a clean break by inserting a knife or your finger at a 45-degree angle into the curds. If they separate cleanly, it's time to cut the curds. If not, let them sit for a few more minutes.
9. Cut the curds into small, uniform pieces using a long knife or curd cutter. Aim for cubes about 1/4 inch (0.6 cm) in size. Allow the curds to rest for 5 minutes.
10. Slowly heat the curds to 102°F (39°C) over the course of 30 minutes, while gently stirring them. Maintain this temperature for an additional 30 minutes, stirring occasionally.
11. Drain off the whey from the curds, reserving a portion of it. Replace the whey with hot water at a temperature of 102°F (39°C) to maintain the curds' heat.
12. Transfer the curds to cheese molds, layering them and applying pressure to remove excess whey. Stack the molds with a weight on top to press the curds for 20-30 minutes.
13. Remove the cheese from the molds and flip it. Re-mold the cheese and apply pressure for another 20-30 minutes.
14. Repeat the flipping and pressing process a few more times over the next few hours, gradually increasing the weight. Press the cheese for a total of 6-8 hours.
15. Remove the cheese from the press, sprinkle cheese salt on all surfaces, and allow it to air dry at room temperature for a day or two.
16. Transfer the cheese to a cheese aging container or cheese cave, maintaining a temperature of around 50-55°F (10-13°C) and high humidity (85-90%).
17. Age the cheese for a minimum of 4-6 weeks, but it can be aged longer for a stronger flavor. Flip the cheese every few days and monitor its progress.
Tips:
- Use high-quality, fresh milk for the best results.
- Maintain a clean and sanitary environment throughout the cheese-making process.
- Follow the temperature and time instructions carefully to achieve the desired texture and flavor.
- Be gentle when stirring and cutting the curds to avoid breaking them too small.
- Monitor the temperature and humidity levels in the cheese aging container or cheese cave to ensure proper conditions for aging and flavor development.
- Regularly flip the cheese during the aging process to promote even drying and flavor development.
The process of making Gouda cheese can take around 4-6 weeks or longer, depending on the desired level of flavor development. The cheese needs to be aged for a minimum of 4-6 weeks to allow the flavors to mature and the texture to develop.
Note: This recipe provides a basic overview of the Gouda cheese-making process. Cheese making can be a delicate and nuanced craft, so it's recommended to consult detailed recipes and resources specific to Gouda cheese-making for more in-depth instructions and troubleshooting guidance.

8.Goat Cheese
Ingredients:
- 1 gallon of fresh goat's milk
- 1/8 teaspoon mesophilic starter culture
- 1/4 teaspoon liquid calcium chloride (if needed)
- 1/4 teaspoon liquid animal rennet diluted in 1/4 cup non-chlorinated water
- Cheese salt
Equipment:
- Large stainless steel pot
- Thermometer
- Long knife or curd cutter
- Cheese molds
- Cheese mat or bamboo mat
- Cheese aging container or cheese cave
Steps:
1. Sanitize all your equipment by thoroughly cleaning them before starting.
2. Pour the goat's milk into a large stainless steel pot and heat it over medium heat until it reaches a temperature of 86°F (30°C).
3. Sprinkle the mesophilic starter culture evenly over the milk's surface and let it rehydrate for 1-2 minutes. Stir gently to incorporate the culture into the milk.
4. If needed, add the liquid calcium chloride to the milk and stir gently to distribute it evenly.
5. Cover the pot and let the milk ripen for 12-24 hours at 72°F (22°C). This allows the culture to acidify the milk and develop flavor.
6. Once the milk has ripened, check the pH using a pH meter or pH test strips. The ideal pH range for goat cheese is around 5.2-5.5.
7. Slowly heat the milk to 86°F (30°C) over the course of 30 minutes, stirring gently to prevent hotspots.
8. Once the milk reaches 86°F (30°C), add the diluted rennet and stir it into the milk using an up-and-down motion for about 1 minute. Then cover the pot and let it sit undisturbed for 1-2 hours to allow the curds to form.
9. After 1-2 hours, check for a clean break by inserting a knife or your finger at a 45-degree angle into the curds. If they separate cleanly, it's time to cut the curds. If not, let them sit for a little longer.
10. Cut the curds into small, uniform pieces using a long knife or curd cutter. Aim for cubes about the size of a pea.
11. Let the curds rest undisturbed for 5-10 minutes.
12. Line your cheese molds with a cheese mat or bamboo mat, and gently ladle the curds into the molds. Allow the whey to drain naturally.
13. After a few hours, flip the cheese molds and continue draining for another 12-24 hours, or until the desired moisture level is reached. You can also add a light weight on top of the molds to help expel more whey.
14. Once the cheese has reached the desired moisture level, remove it from the molds and sprinkle cheese salt over all surfaces. Gently press the salt into the cheese.
15. Transfer the cheese to a cheese aging container or cheese cave, maintaining a temperature of around 50-55°F (10-13°C) and high humidity (85-90%).
16. Age the cheese for at least 5-7 days to develop flavor and texture. You can age it longer for a more pronounced flavor.
Tips:
- Use high-quality, fresh goat's milk for the best results.
- Maintain a clean and sanitary environment throughout the cheese-making process.
- Follow the temperature and time instructions carefully to achieve the desired texture and flavor.
- Monitor the temperature and humidity levels in the cheese aging container or cheese cave to ensure proper conditions for aging and flavor development.
- Regularly check the cheese for any signs of mold or spoilage during the aging process.
The time required to make goat cheese can vary depending on the specific recipe and desired aging period. The cheese can be ready to eat within a week, but for a more developed flavor, it's recommended to age it for at least 5-7 days. Some goat cheeses can be aged for several weeks or even longer for a more intense and complex flavor.
Note: This recipe provides a basic overview of the goat cheese-making process. Cheese making can be a delicate and nuanced craft, so it's recommended to consult detailed recipes and resources specific to goat cheese-making for more in-depth instructions and troubleshooting guidance.
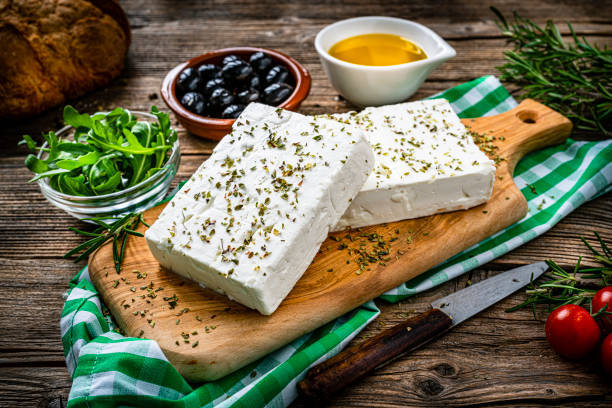
9. Feta cheese:
Ingredients:
- 1 gallon of fresh cow's milk (pasteurized or raw)
- 1/8 teaspoon mesophilic starter culture
- 1/4 teaspoon liquid calcium chloride (if using pasteurized milk)
- 1/4 teaspoon liquid animal rennet diluted in 1/4 cup non-chlorinated water
- Cheese salt
- Cheese aging container or cheese cave
- Cheese mat or bamboo mat
Equipment:
- Large stainless steel pot
- Thermometer
- Long knife or curd cutter
- Cheese molds
- Cheese press
Steps:
1. Sanitize all your equipment by thoroughly cleaning them before starting.
2. Pour the cow's milk into a large stainless steel pot and heat it over medium heat until it reaches a temperature of 86°F (30°C).
3. Sprinkle the mesophilic starter culture evenly over the milk's surface and let it rehydrate for 1-2 minutes. Stir gently to incorporate the culture into the milk.
4. If using pasteurized milk, add the liquid calcium chloride to the milk and stir gently to distribute it evenly.
5. Cover the pot and let the milk ripen for 1-2 hours at 86°F (30°C). This allows the culture to acidify the milk and develop flavor.
6. Once the milk has ripened, check the pH using a pH meter or pH test strips. The ideal pH range for Feta cheese is around 4.6-4.8.
7. Slowly heat the milk to 86°F (30°C) over the course of 30 minutes, stirring gently to prevent hotspots.
8. Once the milk reaches 86°F (30°C), add the diluted rennet and stir it into the milk using an up-and-down motion for about 1 minute. Then cover the pot and let it sit undisturbed for 1-2 hours to allow the curds to form.
9. After 1-2 hours, check for a clean break by inserting a knife or your finger at a 45-degree angle into the curds. If they separate cleanly, it's time to cut the curds. If not, let them sit for a little longer.
10. Cut the curds into small, uniform pieces using a long knife or curd cutter. Aim for cubes about the size of a pea.
11. Let the curds rest undisturbed for 5 minutes.
12. Line your cheese molds with a cheese mat or bamboo mat, and gently ladle the curds into the molds. Allow the whey to drain naturally.
13. After a few hours, flip the cheese molds and continue draining for another 12-24 hours, or until the desired moisture level is reached.
14. Once the cheese has reached the desired moisture level, remove it from the molds and sprinkle cheese salt over all surfaces. Gently press the salt into the cheese.
15. Transfer the cheese to a cheese aging container or cheese cave, maintaining a temperature of around 50-55°F (10-13°C) and high humidity (85-90%).
16. Age the cheese for at least 5-7 days, but it can be aged longer for a more pronounced flavor. During the aging process, turn the cheese daily and remove any excess whey.
Tips:
- Use high-quality, fresh cow's milk for the best results.
- Maintain a clean and sanitary environment throughout the cheese-making process.
- Follow the temperature and time instructions carefully to achieve the desired texture and flavor.
- Monitor the temperature and humidity levels in the cheese aging container or cheese cave to ensure proper conditions for aging and flavor development.
- Regularly turn the cheese during the aging process to promote even drying and flavor development.
The time required to make Feta cheese can vary depending on the specific recipe and desired aging period. The cheese can be ready to eat within a week, but for a more developed and tangy flavor, it's recommended to age it for at least 5-7 days.
Note: This recipe provides a basic overview of the Feta cheese-making process. Cheese making can be a delicate and nuanced craft, so it's recommended to consult detailed recipes and resources specific to Feta cheese-making for more in-depth instructions and troubleshooting guidance.